Note: This entry and others on this blog reflect my own personal experiences at Vermont Instruments, taught by George Morris, during the weeks of October 11 – November 1, 2008. I left out a lot of the details of the process in order to keep this shorter and more for a general audience. There are plenty of good references available on making a guitar and guess what? Everyone does it differently!
You might want to read these posts first:
Introduction
Week 1
“Our interest is in training the next generation of luthiers. Put another way, we are not going to help you build a guitar, we are going to teach you how to teach yourself to build guitars.” – Vermont Instruments website.
Assembling the Parts – Week 2
We were right on schedule as we started up again on Monday – at least I thought we were on schedule, but what do I know? We had made our initial choices with regard to wood, body size, scale length; choices we were going to have to live and learn with for this first guitar. Those choices certainly have consequences once you string up your guitar for the first time and hear it, but I am getting ahead of myself. We have to make “the box”, from all those parts we made last week.
George would joke about having a ceremonial burning of the guitars at the end of the course. (I think he would have done it, too, if he could have gotten away with it.) The point is that the course is not about the guitar you are building, it is about the learning that takes place. We, as students, invest a lot of time into thinking about that “first one” and we become quite attached to it. But we shouldn’t get too attached. We know that. We can’t help it. It is a good reminder that this is your first guitar and not your last.
The first lesson of the week was on carving the heel block. That’s the piece of wood that attaches the neck to the body. In the bolt-on neck, there are two pieces – one glued to the neck and one glued inside the body. The piece on the outside is the heel and usually gets a carving treatment for both aesthetics and playability on the upper frets. There are a variety of designs here, but the basic idea is to have a smooth transition from the neck to the heel.
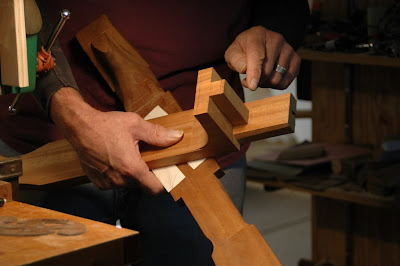 |
| George demoing heel block shaping. |
Heel design was one of those things that I never really thought about before. Decisions, decisions. I checked out my Martin D-18 back at our house. I checked out some plans in the shop for a dreadnought style guitar – a.k.a. a Martin. For most of us, it was difficult to visualize how you were going to get from the block of wood to a smoothly carved heel, but there was a method. Basically, you make a few rough cuts on the band saw along different dimensions to get close to where you need to be. Since you are working on 3 dimensions at once, you need to break it up into different planes and only work on one plane at a time, using a rasp or chisel.
Picture 4955 – first cut on heel block
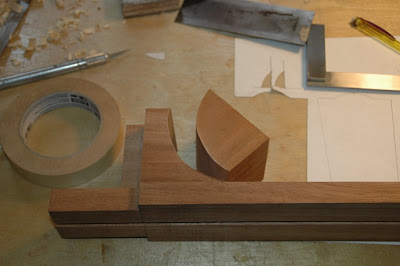 |
| My first cut on heel block. |
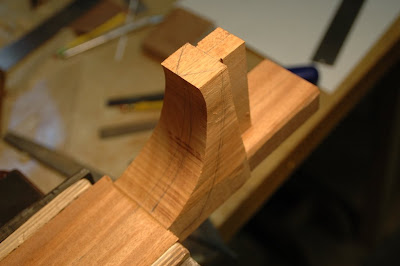 |
| Mark the lines to carve and follow them. |
 |
| Sometimes you have to make lemonade from the lemons you, ahem, cut. |
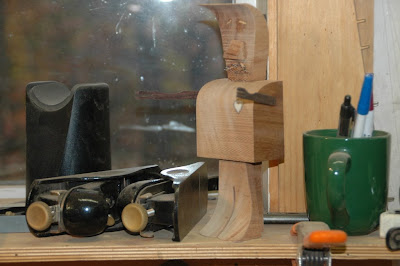
We started working on our headstock too. Not everyone was on the same pace, but the idea was to get the headstock cut out and holes drilled for the tuning machines. This happened over the course of a couple of days. We knew we had to get the neck prepared for assembly, so in-between other work, you could work on the heel carving or headstock. I can tell you I was never so tense as when I was cutting the holes for the tuning machines on the drill press. I held onto that neck for dear life!
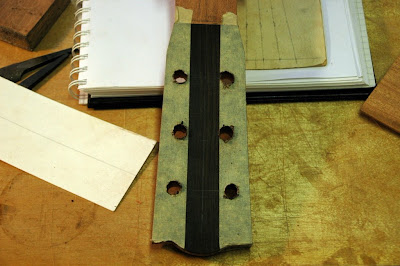 |
| Holes drilled in the headstock. |
Some folks “missed” and had to plug the holes with dowel and do it again. Another lesson, hard-earned – you can always recover in some fashion; it’s either a do-over or an opportunity for a design decision to cover up a miscalculation or rogue router bit. But I’m not telling where those are. What happens in the shop, stays in the shop.
By Wednesday, we were ready to start on the multi-day process to prepare to glue sides to top and back. For the bolt-on neck people, this meant a number of steps designed to get the neck block on the inside of the guitar to line up with the neck itself and bolt on straight. You also need to prepare the sides for gluing, making one side flat and true, for the top, and the other curved to match the back curvature. Finally, you chisel away at your braces to make room for the sides and a perfect fit.
Jon and Tom got to glue there tops on right away because of the traditional neck arrangement they were using.
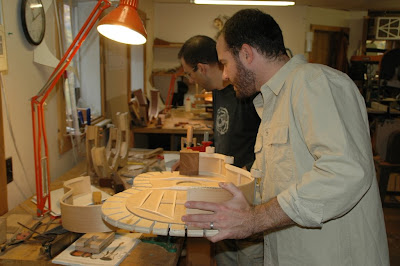 |
| Adam helps Jon line things up for gluing the top. |
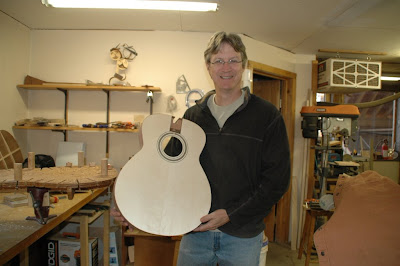
I had to stay after school and finished up by 9 that night. This was an exciting day, however, because the guitar was starting to look like a guitar now.
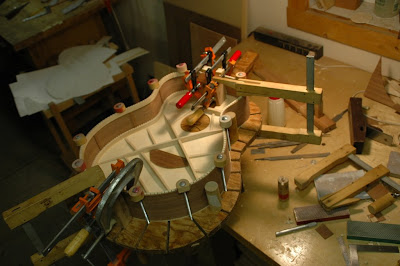 |
| My sides glued onto the top. |
The next day, we got to take off the clamps and get ready for the back gluing.
Here are a few pictures of some happy builders.
 |
 |
| Jon | Tom |
 |
 |
| Brennan | Lynn |
 |
| Yours truly. |
The only thing you have to do to get ready for gluing the back is to plane down the sides and sand them at the right angle using a big curved board with sandpaper on it. Remember, the back is arched, so you can’t just slap it on willy-nilly. In addition, you should do a sanity check on the neck angle to the top (at the bridge) and adjust with shims while you are gluing. I had to shim my neck a bit, as did the folks with the traditional neck attachment.
Lynn, Brennan, and I had to come back after dinner to finish gluing the top. George met us there to supervise this important (and permanent) operation.
 |
| Back glued to the sides now. |
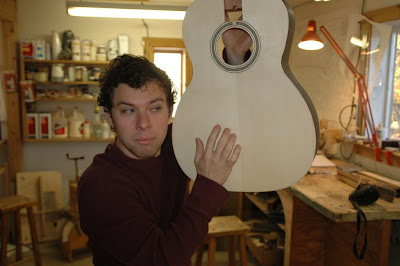
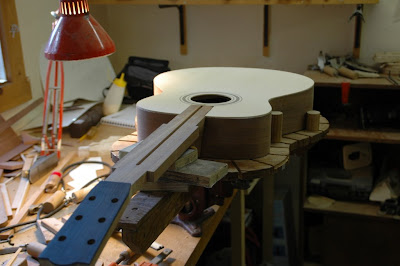 |
| We now have a complete box with a neck! |
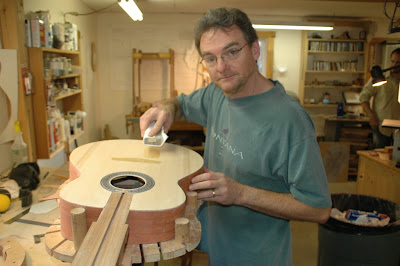
On Friday, we spent some time getting our tops ready for the first coat of finish. Normally, you’d wait on this until all the woodworking is done, but because of our accelerated schedule, we had to start on it. Before finishing, you mask off the area where the bridge is going to be glued, since glue won’t stick to finish too well and the bridge area is the most stressed part of the guitar. You simply get your poster board pattern out and line it up on the fretboard to find the bridge placement. Now you see why getting that correct in the beginning starts to matter.
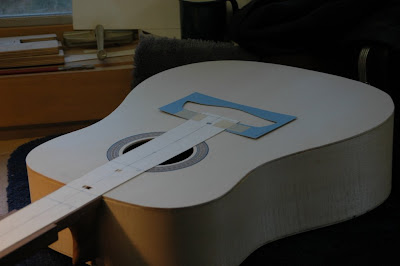 |
| Tom’s guitar with the poster board pattern to find the bridge location. |
 |
| Lynn applies tru-oil to his cedar top. |
I think everyone will agree that the scariest of the scary, stressful, intense steps is routing the binding channels. The bindings are those little strips of wood or plastic that go around the edges of the top and back. You must respect the router! I already had two incidents where the router “got out of hand” and put some dings in the wood – you can’t get that wood back, folks (but you can make a design decision around it, hee hee). To route the binding channels, you have to take a router with a special jig on it and run it around the entire body of the guitar. After that is done, if you have any purfling (little strips of wood that appear on the top or back, these help to demarcate the edges of the guitar) then you have to do it again with a different depth setting.
 |
| George demos the router. |
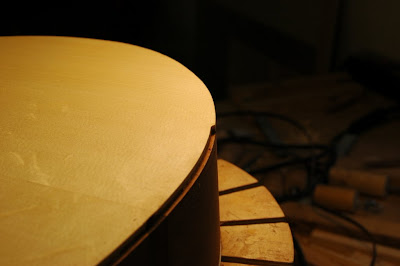 |
| My top after routing part way. |
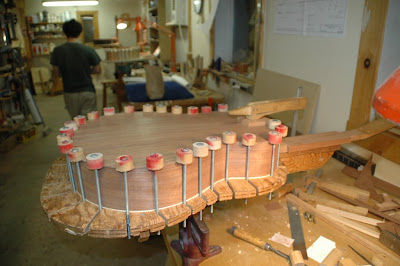
Once the channels get routed, it’s fairly straightforward to put the bindings and purfling in. You do want them to be tight and you can’t really clamp them, so George uses a bunch of rope to get things into place without glue first so you can cut the bindings to the exact size, then glue them on. You use 2-3 ropes to secure things in place, just don’t break the bindings like “someone un-named” did.
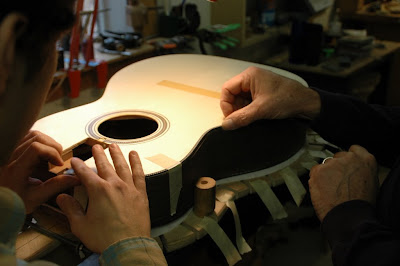 |
| George helps Brennan glue on his herringbone purfling. |
And so ended our second week of guitar building. We have a box that still resonates. We have the beginnings of a real neck and it attaches to our body. We have bindings on. Now it’s nothing but finish work – a fretboard, frets, neck shaping, bridge, inlay, scraping, sanding, finish coats, and set up (i.e. strings).
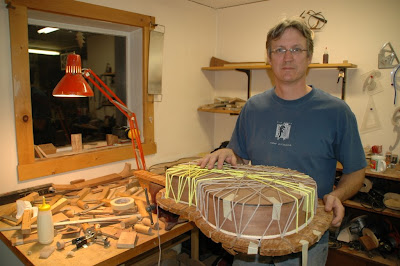 |
| My back bindings are glued up and roped up. |
I spent Sunday morning gluing my top bindings, then my wife and son came up from Boston and we went to Hanover, NH for lunch and to the food co-op to pick up supplies for the next week. Yikes! Only 5+ days to go and so much to do to get to a finished product. The good news is that everyone is progressing along at about the same pace and we can see that there is a finish line in sight.
Chris
Continue reading about week 3…
 |
| My commute… |
1 Comments.