Note: This entry and others on this blog reflect my own personal experiences at Vermont Instruments during the weeks of October 11 – November 1, 2008. I left out a lot of the details of the process in order to keep this shorter and more for a general audience. There are plenty of good references available on making a guitar and guess what? Everyone does it differently!
Making the Parts
As I entered Thetford Center, VT, I pulled over and sent one last text message to my son, Zach. “Leaving civilization. No cell coverage up here”, I told him. I was on my way – to what? I did not know. Post Mills is off of US 91 just north of Hanover, NH. It consists of a general store – Baker’s, where you can get anything from beer and wine to sushi, a deli sandwich, plus your mail – a library, and a lake nearby. There’s even a live bait vending machine out in front of Bakers! Handy. But that’s about it for Post Mills.
Fairlee was the closest town nearby that had cell coverage, a couple of restaurants, and a slightly bigger grocery store, Wings. Plus, the Whippee Dip, an awesome take out place where we got some good barbeque sandwiches. Fairlee was about a 15 minute drive away on Route 5.
I arrived at Vermont Instruments, home of master luthier and teacher George Morris and his wife, Pippa, an artist. It was the afternoon of October 11 (my 22nd wedding anniversary, by the way!) and I found my way into “the addition” which was to be my home for the next 3 weeks. I met one of my fellow students at the door, Brennan, who yelled out for George in his house.
 |
| Our humble abode for 3 weeks. |
George appeared through the door that connects the addition to his house and we all went over to the other rooms over the shop to meet some of the other guys in the course – Lynn and Jon. Tom, the fifth character in our adventure, was out getting lost on his way over from New Hampshire and hadn’t arrived yet. We exchanged pleasantries and jokingly referred to George as the Zen master – he kind of had that air about him; very calm, content perhaps, but also knowing what trials we were about to go through in this effort.
Of course, we were all clueless in this regard. We all had similar anxieties about what was about to occur. Did anyone ever make a guitar before? No. Do you know what you’re going to do? Yes, most had an idea. Does anyone know the schedule? Nope – nothing published on that front. Had anyone ever done any woodworking? No, again. Were you excited about starting? Yes!
 |
| The shop with in-progress expansion. |
Anyway, dinner was at 6:30, hosted by George and Pippa. There, we got to know each other a little better and heard the garbage, recycling, and composting rules. We heard about Bali (another story, but the short version is that George is the master luthier for Blueberry Guitars and taught the builders there). There was some election talk and everyone was on the same page on that front. The pot roast was fabulous and the company stimulating – a great start to the course.
We began at 8 a.m. on Sunday, when we also met Adam Buchwald, our second teacher. Adam is an expert repairman and luthier and plays a mean mandolin and banjo. He’s not so bad on guitar either, I might add! Adam had just moved to Vermont from Brooklyn with his wife and 18 month old son and is helping George expand the school a bit – I think they have some other things up their sleeve, but I didn’t pry on that front. Adam had gone through the course 5 years ago. He proved to be a valuable addition to the mix and added to the personal attention that everyone got from both George and Adam. Believe me, we needed it!
 |
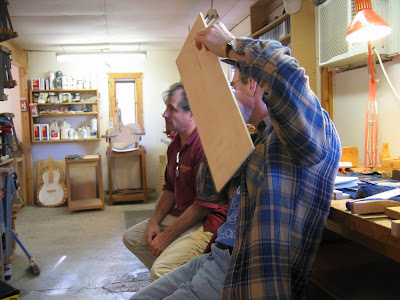
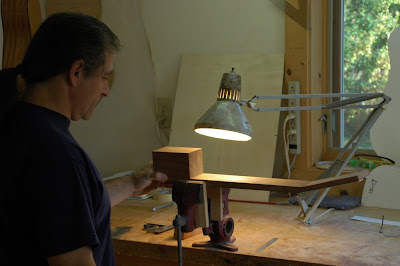
| George shows us the workboard while Adam looks on. |
The regular routine was 8 – noon, break for lunch, 1-6. If you had anything left after that, you could work at night, which we had to do a few times to keep in step. Usually, George started things off with a “lecture” around his bench and the whiteboard (no powerpoint here, thank goodness!) about whatever we needed to accomplish that day.
Something I liked about George’s approach was that he only provided enough information at any one time for us to complete our tasks for that day. We didn’t get a big overview of the course, a huge lecture, a “tell what you told them” routine, and so forth, like you do in so many of those adult classes that pop up everywhere. The philosophy was to learn by doing, and you were going to do it, or you wouldn’t be making a guitar. I also believe there was a conscious effort to not do things for you during the course. In other words, if you were having a question about how to chisel something, they would come and show you a couple of things, but you actually had to do the work. They were very good at backing off and letting you have a go at it, even if it meant making a mistake (the best teacher, after all).
But on to the actual content of the week…looking back, our goal was to get the top, back, sides, and neck ready for assembly in week 2. Something I learned is that there are often many steps in a process to get to the end point. You want a top in the shape of your guitar, ready for gluing? Well, then, choose the wood, glue it together, inlay the rosette, thickness it, cut the soundhole, cut the shape, cut braces, glue braces, shape braces, sand. Now, you’re ready.
George provides a notebook with all of his thoughts and procedures written out for you. Although this is an invaluable resource, I certainly didn’t have the time to study it thoroughly during the course. There is a great discussion of wood and acoustics and their relationship in the beginning. I just re-read it and am starting to understand it better now that I’ve been through the course.
The first morning we got familiar with our workbenches and went over some of the essential basics about how a guitar works, because we were going to stat choosing our wood right away. There’s a lot of theory and experience applied to choosing your wood to get the sound you are after in that particular guitar you are building. Do you want a warm or bright sound? Fast attack? Boomy bass? Evenness across the range? All of these things can be controlled by choices you make along the way and have to do with how the energy of the strings is transferred to and distributed across the structure of the guitar.
 |
| My workbench and tools. |
I think the single most important thing you can do in guitar building is to choose high quality woods to use, although there is that famous Bob Taylor palette guitar. But for the amateur, like me, it’s probably more important to start off right away with good tonewood. We got going right away choosing our tops. George and Adam brought out a bunch of wood for us to pick through and tap on, either spruce or cedar. The goal was to join the 2 pieces together so they could set overnight.
 |
| Tapping the tops. |
We also had to choose what shape guitar we were going to build. Here’s where everyone ended up, all of us with completely different guitars:
Tom – a standard dreadnought, spruce top, maple back and sides, rosewood bindings.
Lynn – the Morris #9 style, cedar top, padauk back and sides, padauk bindings.
Brennan – 000 size, spruce top, rosewood back and sides, maple bindings.
Jon – classical body (for flamenco), cedar top, cypress back and sides, rosewood bindings.
Chris – Morris #9 1/2 style, spruce top, mahogany back and sides, rosewood bindings.
George and Adam – slope shouldered dreadnaught (Gibson style), spruce top, rosewood back and sides, maple bindings (I think).
All fretboards were ebony and the necks mahogany with ebony headstock veneer and bridge. We chose various scale lengths (the length of the strings from end to end), but most were in the 25.4 inch range (645 mm).
 |
| Lynn’s padauk back. |
An important aspect of the process is to make an accurate poster board pattern of your guitar and fretboard. I cannot emphasize this enough. This pattern is used over and over again to create the dimensions of the guitar, especially the fretboard, which will determine how well and in tune the guitar plays. You don’t know this yet, but there a several key places on the neck that require these measurements. It will become apparent in a few weeks when you are trying to place the bridge and saddle on the top, too. Knowing where your centerline is, too, is also extremely important. The shop joke is about finding the right centerline so everything lines up, since you transfer the line to a few different pieces of wood at different times – let’s just say that it can stray off on its own.
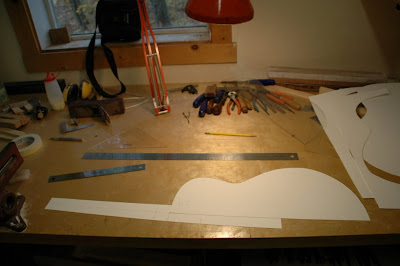 |
| My poster board patterns. |
Working the top was a multi-stage process, as I outlined above. Let me tell you, the first time you have to cut into your top is traumatic. Actually, the second and third and fourth time is, too! We had to install our rosette patterns around the soundhole, clean it up with scraping and sanding, then cut the soundhole. This required some precise measuring and figuring to put it all in the right place. The first major cut after the soundhole was to cut the guitar shape out on the bandsaw. This was one of those go slow and don’t mess up moments but we all survived it.
 |
| The completed top, for now… |
Later in the week we put on the braces in our chosen pattern. Brace patterns are another place where your choices effect the end sound of the guitar. You want them stiff enough to keep the guitar together but light enough so you don’t deaden the sound. Most people chose a variation of the standard Martin X-bracing. Jon did a flamenco fan sort of thing and Lynn did a lattice bracing. You glue the braces on using the go-bar deck – see pic below. Your sharp chisel is your friend while shaping the braces, always going back to tap the soundboard to see how you are effecting the sound.
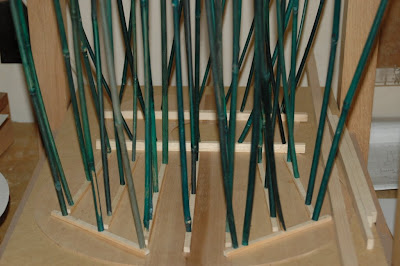 |
| Gluing on bracing – Jon’s guitar – with the go-bar deck. |
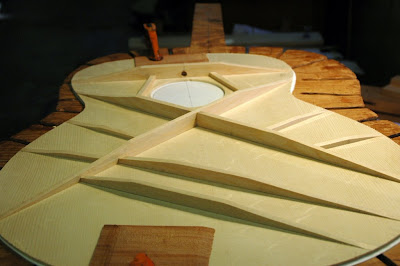 |
| My top after initial shaving of the braces. |
Next, we dealt with the initial stages of creating a neck. This is cut from a big mahogany chunk going from 3/4 to 7/16 inches. The style we did was cut at a 15 degree angle on the fat end using the bandsaw, then planed and glued together to make the headstock (where the strings and tuners go). We had to make a choice on how the neck attached to the body – either the traditional method (a.k.a. classical style) or a bolt-on. Both work perfectly well. It’s harder to get the initial bolt-on set up correct, which some of us found out in week 3, but it has the advantage of being able to be removed easily, with no gluing involved. Tom and Jon did the traditional neck and the rest of us did the bolt-on. For me, each of my choices was based on what I wanted to learn in the course and although more difficult to execute correctly, it seemed like a good thing to learn.
 |
| Tom lines up his neck block. |
The back was pretty straightforward. A bunch of wood came out of the humidity regulated storage and we picked through it to find the right piece for the sound we were after. You had to take the 2 pieces and joint them as we had done for the top and then scrape and scrape to get to the desired thickness. Later in the week we cut out the shape using our pattern added the bracing. One interesting aspect to the back is that it is not flat. It has a domed shape in 2 directions – side to side and over the length. That means your braces need to curve – it’s not hard to do, just something you have to do before gluing them on. The go-bar deck has one end that conforms to this complex curve so when you glue on the pieces, the back gets bent into that shape.
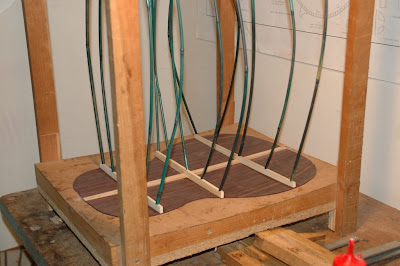 |
| Brennan’s rosewood back getting braces glued on. |
On the last day of the week, Saturday, we worked on the sides. You need to get bookmatched sets of wood, scrape and sand and plane them and align the grains so they are perfectly matched. Bookmatched means that the wood slices you are using used to be right next to each before someone cut them in half. In practice, it means that you have a set that have a matched grain pattern, so they look like twins. Sides also have a curvy side where it meets the back and a true side for the top. There are patterns available for you to follow that match your body style and size. Another decision point is how deep you want your guitar to be. This usually ranges between 4 1/2 inches and 3 inches. The curve typically will take off 1/2 inch at the neck end.
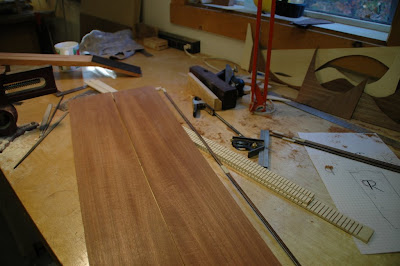 |
| My mahogany sides getting bookmatched and lines up for bending. |
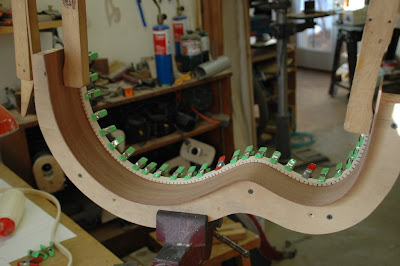
The side-bending wasn’t as dramatic as I imagined it to be from my reading. There’s a jig that you use along with a heat source and some steel plates. The typical jig uses 3 lightbulbs for the heat source, and some folks used that. Adam brought in his modern heat blankets and spring steel, which worked really well. According to George, it’s the heat that makes the wood pliable, not water, as commonly thought. The heat can go up to 300 degrees. We bent the sides along with our bindings and the linings were done separately. You just have to use a different template for each size guitar you are building so you bend it in the right place and shape. Finally, we glued on the linings to the sides. These are what the top and back get glued to next week.
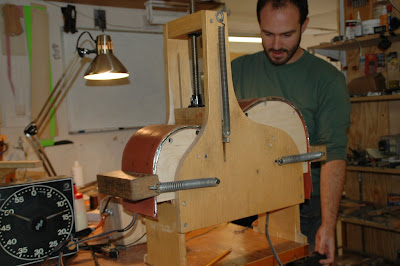 |
| Adam with the bending jig and heat blankets, cooking some sides. |
 |
| My sides getting their first lining glued on. |
On Sunday, a few of us spent some time in the shop finishing our top and back brace shaving activities. I headed off to Quechee Gorge for the afternoon and got some great photos of the water by messing with my shutter speed. Some are quite abstract, but I like them.
 |
| Quechee Gorge |
I went to Lebanon, NH to buy more socks (who wants to do laundry?), do some shopping at a big grocery store, and eat at Panera.
One thing I did not anticipate was how tired I was going to be at night. This was not a relaxing vacation, it was hard work everyday with only 2 days off. We’d usually get back to the addition about 6 p.m., make dinner, see if the internet was working enough to upload that day’s pictures – usually it was fine for uploads, but no other site was working – DNS issues with the satellite provider, then sit around and look at guitar books from the library there and discuss what we did that day and what was coming up the next day. It was total guitar building immersion and we all loved it! Where else can you go to talk about guitars 24×7 without boring everyone to tears?
Although we got a lot of pieces done this week, this was only the beginning. You cannot be in a hurry building a guitar. Measurements have to be accurate to the mm or less. And as I said earlier, there are many steps to get you to the finished product, with many opportunities for screw-ups. The weeks ahead will prove to be even more stressful as we start to assemble the pieces into what starts to resemble a guitar box.
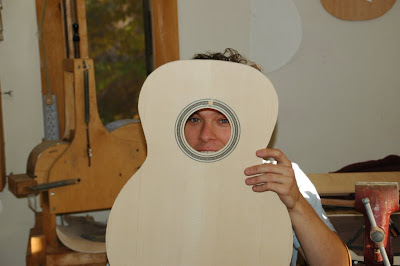 |
| Brennan’s OOO body with rosette ready for gluing next week. |
2 Comments.